Background
Disaster Recovery has always been a hot topic for business and for the longest time DR was an exclusive feature for those with huge IT budgets and expensive SANs doing replication at the array level.
Fortunately things have moved on and there are a number of purely software-based technologies which bring disaster recovery functionality within reach of even small users; for VMware-based VMs there are many options including pure vSphere Replication, Site Recovery Manager, Veeam and Zerto.
I'm a big fan of both VMware and Amazon Web Services and the lack of any useful product to link these technologies together has often been a point of discussion in client meetings; an on-site VMware solution needs somewhere else to replicate to - AWS should be a perfect fit for this!
At $dayjob we've often quoted customers for just this, it's been based around Veeam backups. However, I have often played through a scenario in my head that would allow regular vSphere snapshots to be replicated to a 'pilot light' environment in AWS using only native tools.
Last weekend, I made it happen.
Last weekend, I made it happen.
Theory
In my head at least, it's quite straightforward. Take an initial snapshot, replicate it to AWS and then make use of vSphere Changed Block Tracking so that with every future snapshot, only the differences between each snapshot will need to be replicated, thus vastly reducing replication overhead when I need to get that data into AWS!
Step One: Take a snapshot
.png)
I use VMware's PowerCLI PowerShell cmdlets to connect to the vCenter Server (a single ESXi host should also work) and take a snapshot of the VM I want to protect.
The first time I do this, pass the 'QueryChangedDiskAreas' function a ChangeID of "*" - vSphere knows this to mean 'give me a list of all the active extents for that disk'
Many thanks to Scott Herold, the VMguru for this great post which told me how QueryChangedDiskAreas worked and how to get the ChangeId for the each virtual hard disk!
Scott makes a great job of writing function-based code that handles errors. For brevity, the necessary code can be distilled right down to this:
 Connect-VIServer -Server ... -User ... -Password ....
 $vm = Get-VM -Name dc02
 $vmview = $vm | Get-View
 $newSnap = $vm | New-Snapshot -Name "Karma Sync"
 $newSnapview = $newSnap | Get-View
 $changes=$vmview.QueryChangedDiskAreas($newSnapview.MoRef, 2000, 0, "*")
 $changes.ChangedArea | Format-Table -HideTableHeaders > thefile.txt
 $thischange=($newsnapview.Config.Hardware.Device | where { $_.Key -eq 2000 }).backing.changeid
 #$newSnap | Remove-Snapshot -Confirm:$false #run at end of Step Two
              0       2097152
        7340032      15728640
       31457280       5242880
      104857600      23068672
      133169152       8388608
      145752064      24117248
      173015040      176160768
      351272960      49283072
      401604608      319815680
      724566016       1048576
      728760320       5242880
      735051776     2194669568
     2930769920      328204288
     3260022784       8388608
     3280994304      108003328
     3536846848     2985295872
     6525288448       6291456
     6532628480     1857028096
     8398045184       8388608
     8412725248      15728640
     8431599616      20971520
     8455716864       3145728
     8459911168      11534336
     8474591232       7340032
     8484028416       5242880
     10209984512      158334976
     42947575808       1048576
This list describes the byte offsets and data lengths of every area of the vmdk which is actually in use - this way we don't need to transfer every byte of the hard disk (most of which will be zeroes)
Step Two: Retrieve the block payload
.png)
thefile.txt tells us the parts of the disk we should be interested in and we now need to get those bytes. I amended the 'vixDiskLibSample.cpp' sample program which comes with VMware's Virtual Disk Development Kit.
I edited the 'DoDump' function which allowed you to specify an offset and byte count for it to spit out a hex-dump of that portion of the disk. I removed the hex-dump feature and changed the function so it would instead write a series of files to the current directory.
For every line of 'thefile.txt', the DoDump function will now write a file whose name is the byte offset. The length of that file is, you guessed it, exactly the size of the change.
For every line of 'thefile.txt', the DoDump function will now write a file whose name is the byte offset. The length of that file is, you guessed it, exactly the size of the change.
After running the code, you end up with an 'ls -l' output like this:
-rw-r--r-- 1 root root   2097152 Feb  9 22:21 0
-rw-r--r-- 1 root root  15728640 Feb  9 22:21 7340032
-rw-r--r-- 1 root root   5242880 Feb  9 22:21 31457280
-rw-r--r-- 1 root root  23068672 Feb  9 22:21 104857600
-rw-r--r-- 1 root root   8388608 Feb  9 22:21 133169152
-rw-r--r-- 1 root root  24117248 Feb  9 22:21 145752064
-rw-r--r-- 1 root root 176160768 Feb  9 22:21 173015040
... and so on
Step Three: Sync to AWS
.png)
Amazon Web Services recently launched a unified CLI tool to bring together a ton of individual tools. This is great news since the configuration and usage for each of those tools was different - you'd end up with a whole stack of Python, Ruby and Java and duplicated configs. Oh dear lord so much Java. I digress.
I create an S3 bucket called 'gdh-vm-replication' in which to store the change sets and then run 'aws s3 sync' to push the changes up:
# aws s3 mb s3://gdh-vm-replication/
# aws s3 sync ./ s3://gdh-vm-replication/
upload: ./10266279936 to s3://gdh-vm-replication/10266279936
upload: ./10223616 to s3://gdh-vm-replication/10223616
upload: ./10255335424 to s3://gdh-vm-replication/10255335424
Completed 3 of 508 part(s) with 497 file(s) remaining
... and so on
Step Four: Sync to disk file
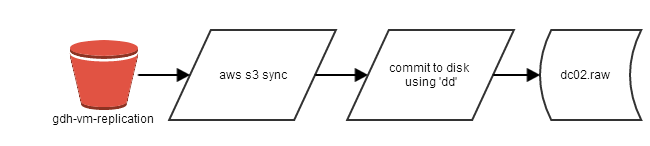.png)
# dd if=/dev/zero of=/mnt/dc02.raw bs=1M seek=40959 count=1# aws s3 sync s3://gdh-vm-replication/ /tmp/spool/- Apply those changes to a local disk file
# ls -1 /tmp/spool | awk '{print "dd if=/tmp/spool/" $1 " seek=" $1/65536 " of=/mnt/dc02.raw bs=64k "}' | sh
dd if=/tmp/spool/0 seek=0 of=/mnt/dc02.raw bs=64k
dd if=/tmp/spool/7340032 seek=112 of=/mnt/dc02.raw bs=64k
dd if=/tmp/spool/31457280 seek=480 of=/mnt/dc02.raw bs=64k
dd if=/tmp/spool/104857600 seek=1600 of=/mnt/dc02.raw bs=64k
Step Five: Repeat as needed
Repeat all of the above steps every 15 minutes, or as often as you wish. The only thing of particular note is that back in Step One when you retrieved the value of $thischange, you must ensure that the NEXT time you take a snapshot, you pass that value into the QueryChangedDiskAreas function instead of "*", otherwise you will be syncing the entire disk each time!
Step Six: Invoke disaster recovery
Ah yes. That nice unified CLI I mentioned earlier? It's not quite completely unified yet, so the older EC2 API tools are still necessary :/
I hope they will be incorporated into the unified AWS CLI soon - I logged a support case / feature request about that, since the console output of the ec2-import-instance command is an utter fright - look:
# ec2-import-instance -O AKIAxxxxxxxxxxxxxx  -o AKIAxxxxxxxxxxxxxxx -W cxxxxxxxxxxxxxxxxxxxxxxxxxxxxxxxW -w cxxxxxxxxxxxxxxxxxxxxxxxxxxxxxxxxxxW -b gdh-vmimport --region eu-west-1 -f RAW /mnt/dc02.raw

Requesting volume size: 40 GB
TaskType        IMPORTINSTANCE  TaskId  import-i-fh6yum0c       ExpirationTime  2014-02-16T22:36:58Z    Status  active  StatusMessage   Pending     InstanceID      i-760d4437
DISKIMAGE       DiskImageFormat RAW     DiskImageSize   42949672960     VolumeSize      40      AvailabilityZone        eu-west-1c      ApproximateBytesConverted   0       Status  active  StatusMessage   Pending
Creating new manifest at gdh-vmimport/41f1f52b-62e8-45d4-a3f9-9d3de98b5749/image.rawmanifest.xml

Uploading the manifest file
Uploading 42949672960 bytes across 4096 parts
0% |--------------------------------------------------| 100%
   |===========
This will take ages to upload - the 40GiB took approx 45 minutes on an m3.medium. After that, Amazon will boot the instance behind the scenes, install EC2Config and the Citrix PV SCSI and Network drivers.
This takes approximately 15 minutes. That brings the minimum achievable 'Recovery Time Objective' to no less than one hour, which is a bit sucky.
Instance i-760d4437 (mentioned in the output from ec2-import-instance) will be ready to start - you did remember to open port 3389 in the Windows host firewall, didn't you? ;)
All comments welcome - this is a Proof of Concept piece of work and while it works, you'll want to add a wrapper for monitoring, reporting, alerting and configuration.
Code reference
Here's a patch of the changes I made the VMware's vixDiskLibSample application. I am not a C++ programmer! --- vixDiskLibSample.cpp.orig 2014-02-08 01:45:58.289800491 +0000
+++ vixDiskLibSample.cpp 2014-02-08 16:04:53.599361218 +0000
@@ -17,6 +17,7 @@
#include <sys/time.h>
#endif
+#include <fstream>
#include <time.h>
#include <stdio.h>
#include <stdlib.h>
@@ -1300,19 +1301,37 @@
DoDump(void)
{
VixDisk disk(appGlobals.connection, appGlobals.diskPath, appGlobals.openFlags);
- uint8 buf[VIXDISKLIB_SECTOR_SIZE];
+ uint8 buf[65536];
VixDiskLibSectorType i;
+ std::ifstream infile("thefile.txt");
- for (i = 0; i < appGlobals.numSectors; i++) {
- VixError vixError = VixDiskLib_Read(disk.Handle(),
- appGlobals.startSector + i,
- 1, buf);
- CHECK_AND_THROW(vixError);
- DumpBytes(buf, sizeof buf, 16);
+ using namespace std;
+
+ long long a, b;
+ while (infile >> a >> b)
+ {
+ appGlobals.startSector = a / 512;
+ appGlobals.numSectors = b / 65536;
+ char outfilename[40];
+ int n;
+
+ n=sprintf (outfilename, "delta/%llu", a);
+ std::ofstream outputBufferHere(outfilename, std::ios::binary|std::ios::out);
+
+ for (i = 0; i < appGlobals.numSectors; i++) {
+ VixError vixError = VixDiskLib_Read(disk.Handle(),
+ appGlobals.startSector + (i * 128),
+ 128, buf);
+
+ CHECK_AND_THROW(vixError);
+// DumpBytes(buf, sizeof buf, 16);
+ outputBufferHere.write((const char*)buf, 65536);
+ }
+ outputBufferHere.close();
}
+ infile.close();
}
-
/*
*--------------------------------------------------------------------------
*


